Archive for the ‘abstract painting’ Category
Saturday, March 17th, 2018
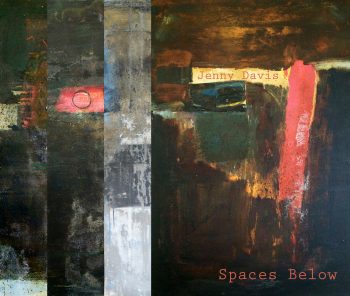
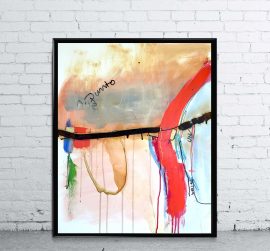
Jenny Davis
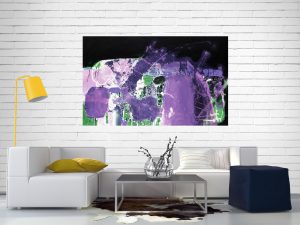
Spaces Below
11th – April – 20th May
Official Opening: Friday April 13th – 6.00 – 7.30 pm
Dear Friends
Jenny Davis would like to invite you to her new exhibition, “Spaces Below”
in the beautiful Yarra Valley, at the historical Yering Station at Yarra Glen in Victoria.
Exhibition runs – April 11th – May 20th
Address – Yering Station Art Gallery
38 Melba Highway Yarra Glen
Opening Times – Monday-Friday
10:00am – 5:00pm
Weekends & Public Holidays (including Anzac Long weekend)
10:00am – 6:00 pm
Commission from all sales will be donated to… L.A.R.C.H.
(Leukaemia Auxiliary Royal Children’s Hospital)
For more information please contact
Dr Ewen Jarvis
Curator
Yering Station Gallery
PO Box 390
Yarra Glen Vic 3775
P + 61 3 9730 0100
M + 0400 894 646
artgallery@yering.com
www.yering.com
Yering Station is located at 38 Melba Hwy Yering 3770 Victoria, Australia. Directions.
Tags: abstract art, abstract painting, art exhibitions, art for charity, Art for sale, artist jenny davis, contemporary art, Larch, mixed media, new work, outlook8studio, Painting, Paris, Photography, Spaces Below, underground, yering station
Posted in Abstract art, abstract painting, acrylic painting, Art Exhibition, Art exhibitions, contemporary art, Framed Prints, industrial art, Jenny Davis, mixed media, New Work, outlook8studio, Painting, Photography, Spaces Below, Uncategorised, underground, women artists | No Comments »
Sunday, March 4th, 2018
Abstract art strips away the narrative, the real and expected visual story. It requires us to resolve a problem. We want to impose a rational explanation – or see something in abstract art so we feel comfortable. It makes our brains work harder and in a different way – at a subconscious level.
Maybe that’s why some people find abstract art more intimidating and are quick to dismiss it.
If you are interested in learning more about abstract art and how to create abstract paintings, I am in the process of creating my first online course. “Pure Abstract Painting”

This is something I have been wanting to do for many years and will let you know when my course is ready for enrollment.
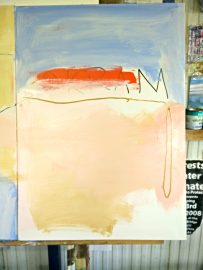
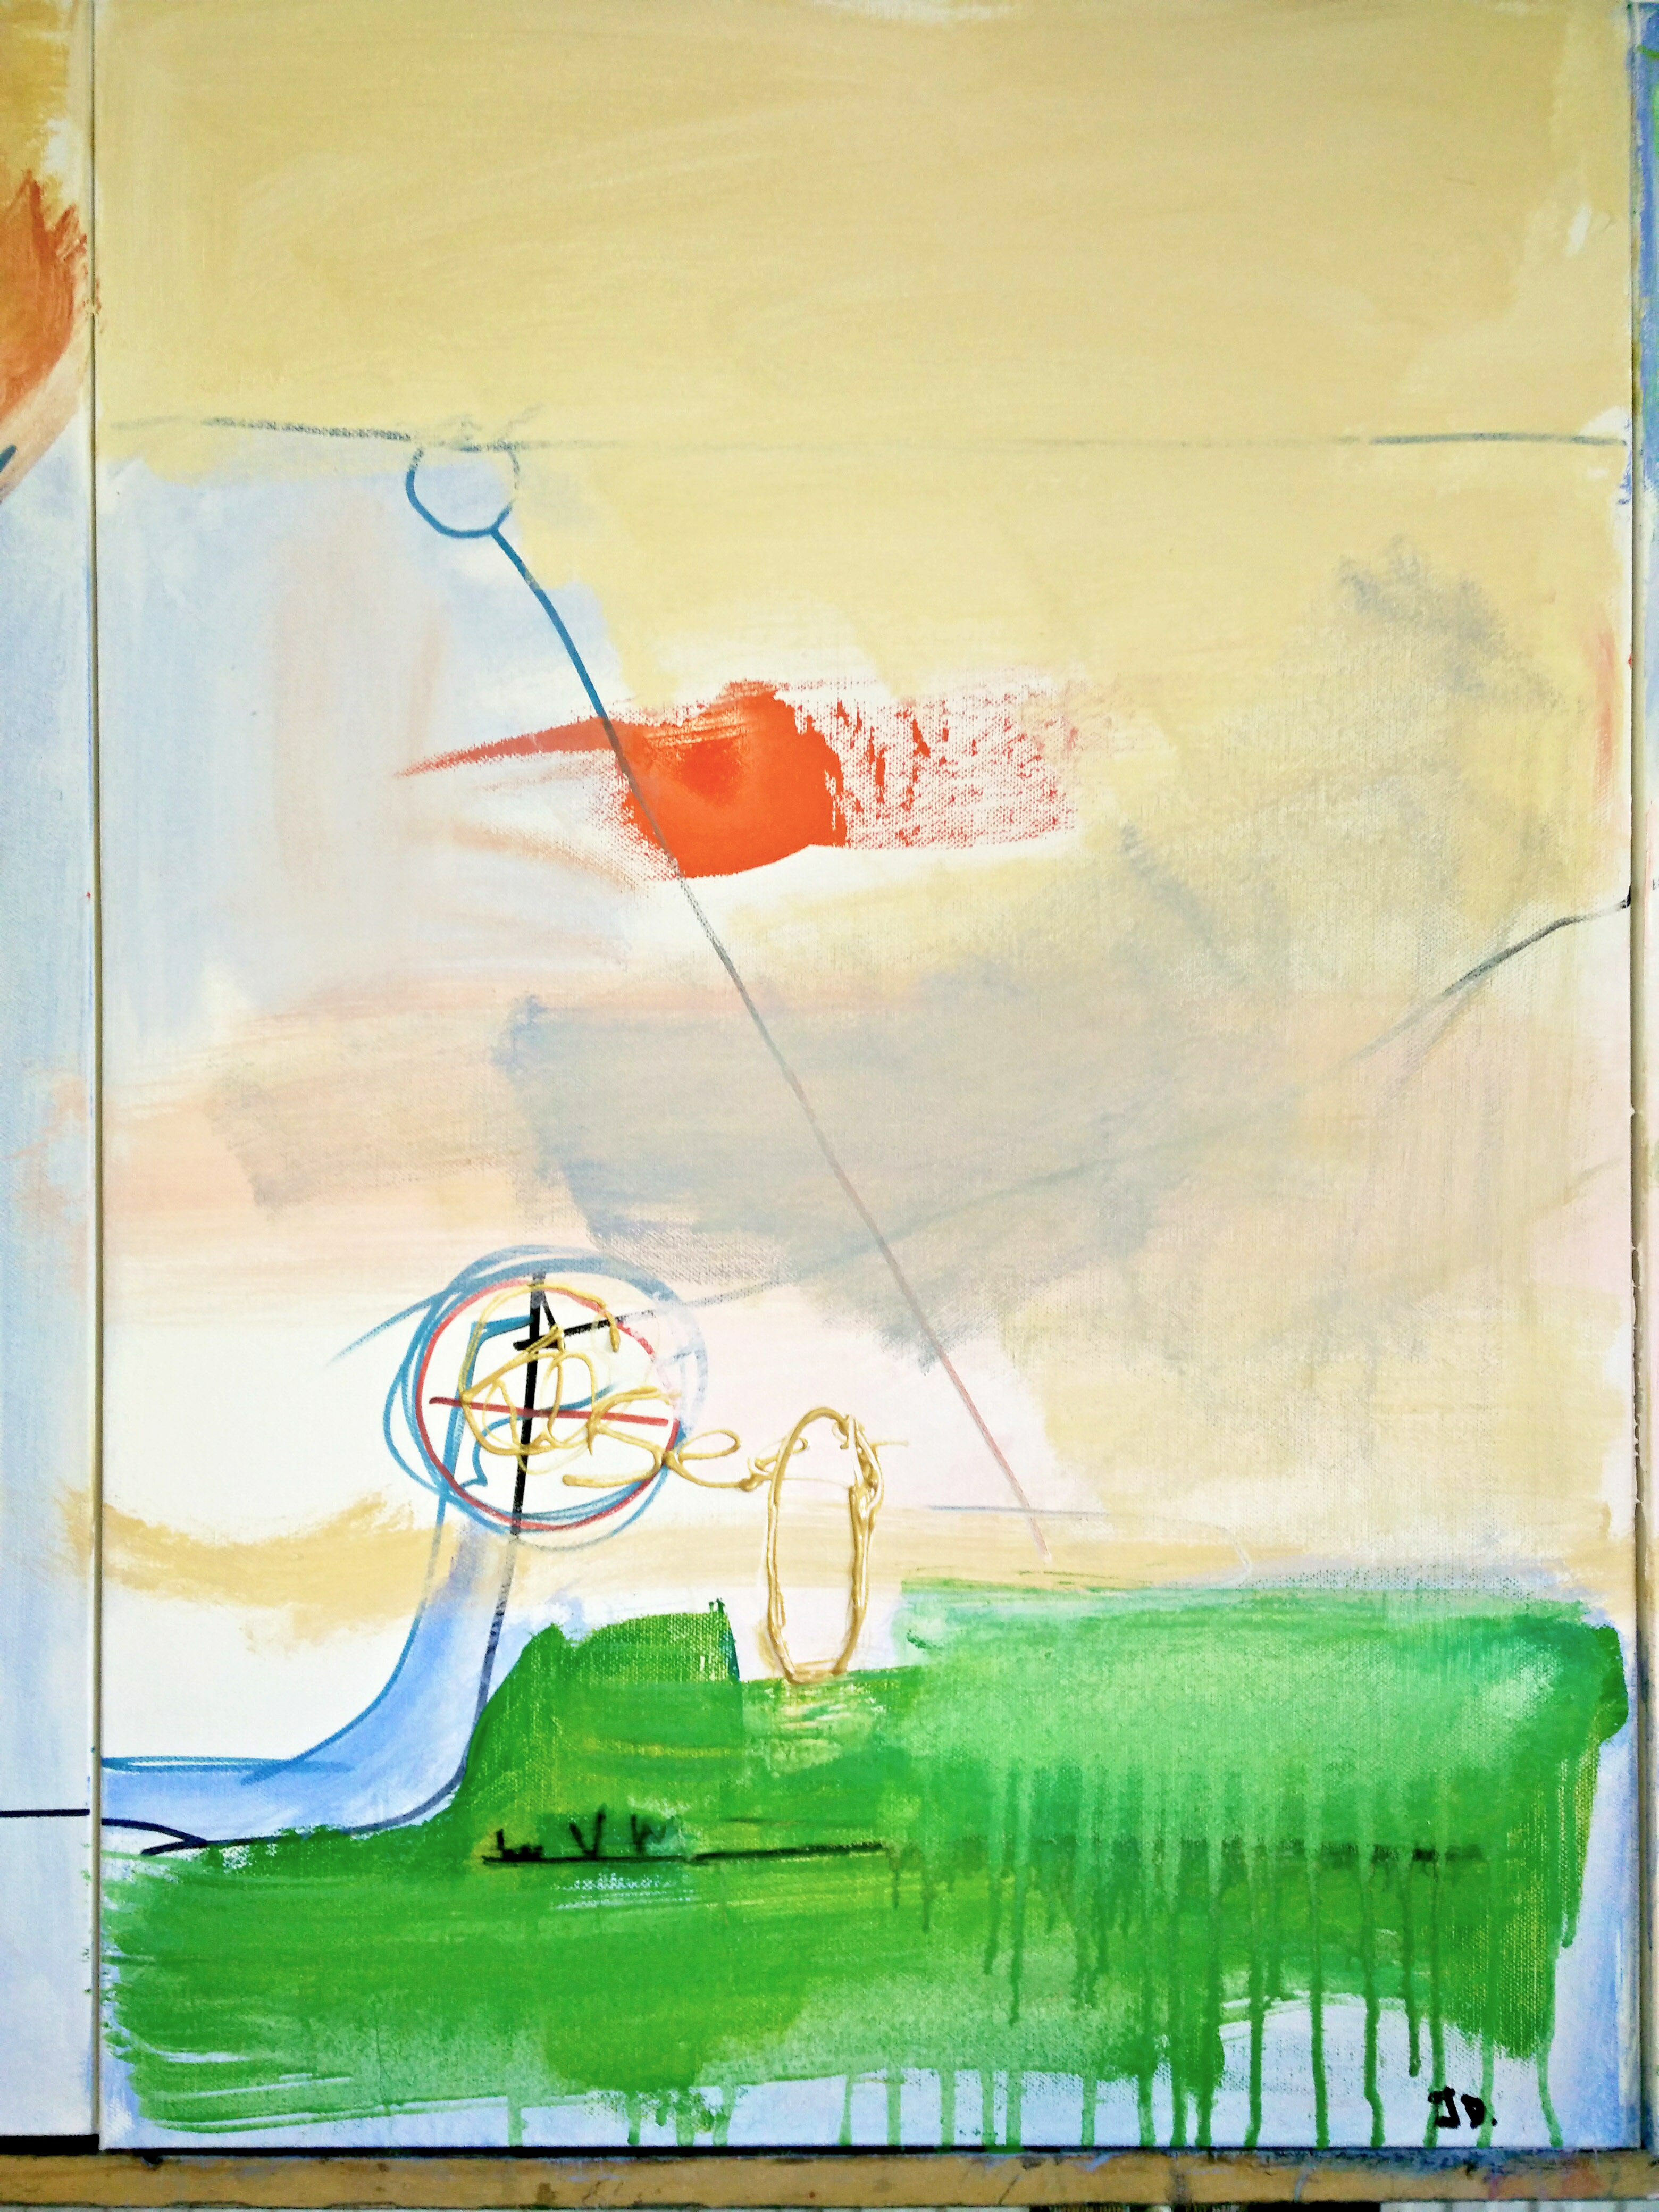
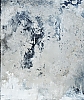
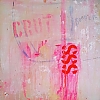
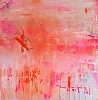
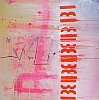
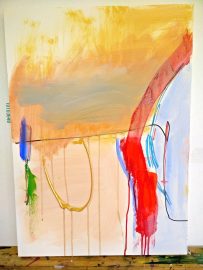
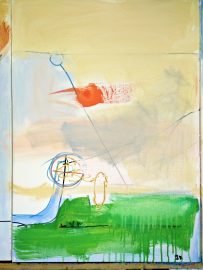
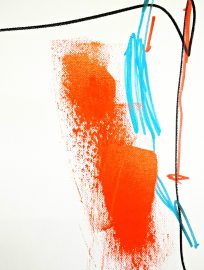
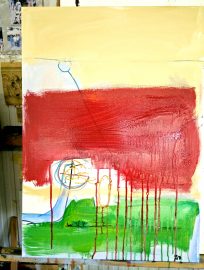
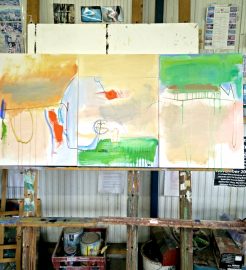
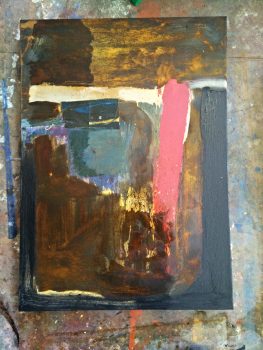
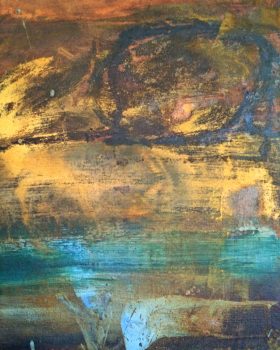
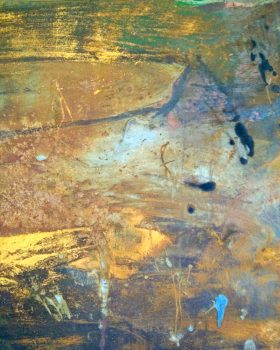
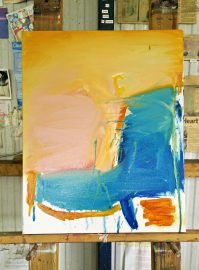
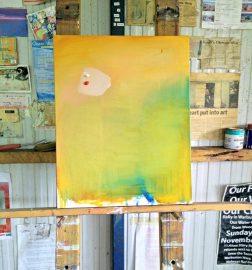
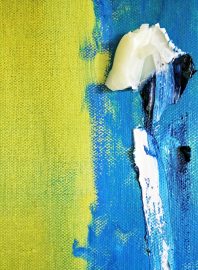
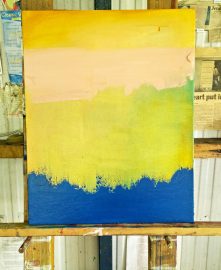
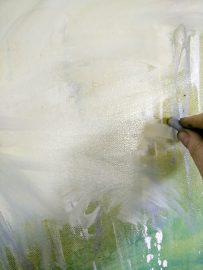
A few abstract paintings I’ve been working on today. I love the continual changes when working this way.
Tags: +abstract art course, abstract art, abstract painting, artist jenny davis, contemporary art, inspiration, mixed media, online abstract art course, online course, Painting, pure abstraction, work in progress
Posted in Abstract art, abstract painting, acrylic painting, Art course, creating, how to, Jenny Davis, mixed media, New Work, outlook8studio, Painting, paintingoncanvas, pure abstraction, thoughts on art, Uncategorised, women artists | 4 Comments »
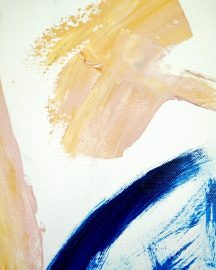
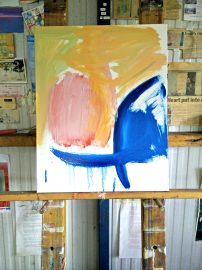
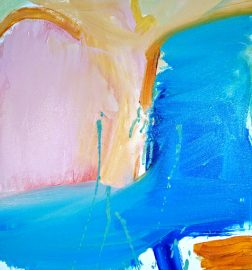
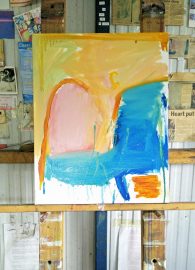
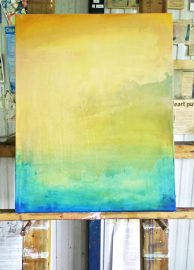
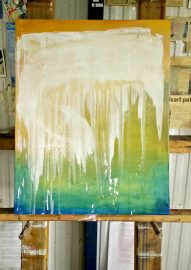
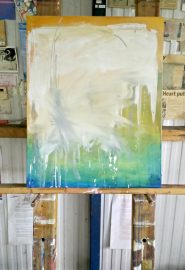
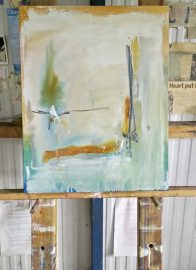
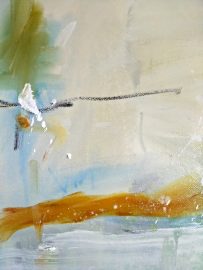
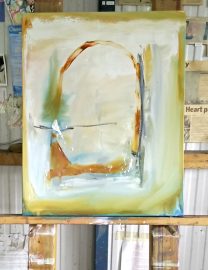
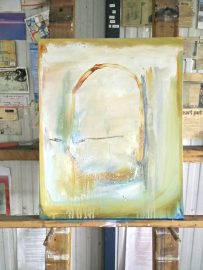
Saturday, March 3rd, 2018
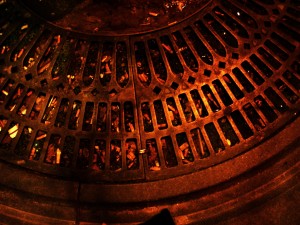
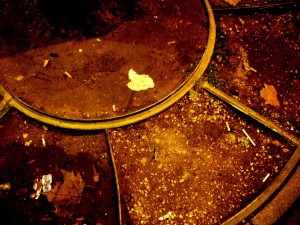
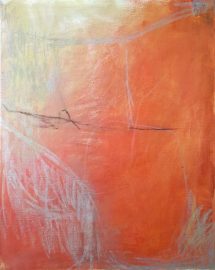
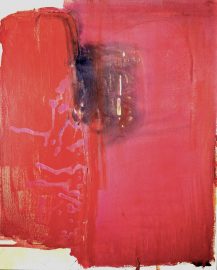
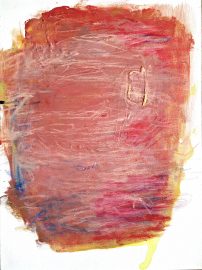
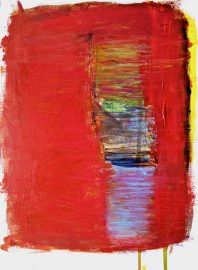
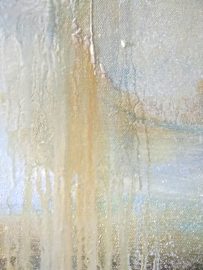
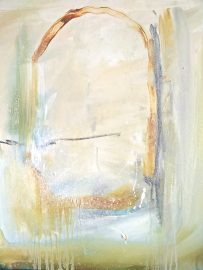
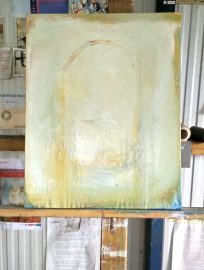
A small glimpse of paintings in progress for my next exhibition, in April at Yering Station Gallery. I will be showing, new and older paintings and will include an installation of framed photographs, “Spaces Below”, shot in France. The gallery is large and raw with an industrial feel. A perfect space for larger abstracts. All commissions taken from my sold artworks at Yering Station Gallery will be donated to…

Tags: abstract art, abstract painting, artist jenny davis, contemporary art, Exhibitions, mixed media, Painting, work in progress
Posted in abandoned, Abstract art, abstract painting, Art Exhibition, discarded, industrial, paintings, Paris, rust, underground, Wallmatter, Work in progress | 2 Comments »
Monday, February 19th, 2018
Ever wish you could buy that original piece of art but it was just too expensive and out of reach? I know I have.
Have you ever considered prints of your favourite originals?
Even if you can’t afford an original piece of art, purchasing prints can be more affordable and if the original artwork is sold, there may be prints available. It not only brings art into your home but, it also supports the artist community too.


I have recently been setting up my online print shop, where you can now purchase prints of my original artworks.
Please see my Gallery page or, click the headings below. There you can browse my selection of framed prints, canvas prints, art prints, acrylic block prints and metal prints.
ABOUT MY PRINTS
The source, for all my art prints, are created in my studio by hand, in (Australia) using my original artworks and photographs. Hand drawing, painting, photography and making collage, is all part of the creative process. Then, the prints are ethically produced by my digital printing partners in Melbourne, Australia, USA and London,England. My prints come in many sizes and prices, to suit your budget. All prints are created from the best, fine artist grade, papers, canvas and materials. Each print is clear and vibrant using specialists inks that will last. Your purchase is wrapped carefully then, packaged in sturdy custom- made boxes, so they make it safely to your door. Please see … Worldwide Delivery plus 100% Returns and Exchanges
I am still in the process of creating my online print shop and will gradually add more prints over time. Enjoy your browse!
Custom-made box or flat frame styles. High-quality timber frame finishes to suit your decor. Premium Perspex – clearer and lighter than glass. Exhibition quality box or flat frame styles.
Each custom artwork is hand stretched and printed for your order. Vibrant colors printed on artist grade canvas. Printed image wraps 0.25 inch (0.6 cm) over the edges; the sides are white. Hanging hardware is included.
Custom sized prints (with various border widths). Gallery quality vibrant colours.
Lightly textured 100% cotton paper.
Refer to size chart for dimensions if self framing.
Vibrant back mounted photographic prints 1″ (2.5 cm) thick. Solid free-standing acrylic block for desk, table top or shelves. Diamond cut sides provide a sharp image from any angle. Hand polished for a crystal clear finish.
Available in both High Gloss and Satin. Gently rounded corners. Cleanable surface. Lightweight aluminium is literally infused with the chosen artwork.
Tags: abstract art, acrylic blocks, affordable art, Art for sale, art prints, artist jenny davis, bright colours, canvas prints, contemporary art, framed prints, metal prints, modern art, outlook8studio, Painting, Photography, prints, prints for sale
Posted in Abstract art, abstract painting, Acrylic Blocks, affordable art, Art for Sale, Art prints, Framed Prints, Metal Prints, Prints, Uncategorised | No Comments »
Wednesday, February 7th, 2018
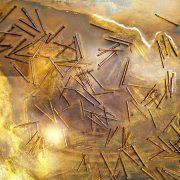
As a small child I pulled things apart. Even, before I could talk, I ripped apart dolls and toys. I used to make little displays, installations of the fragments and other discarded things. Today I still pull things apart. I find fragments more pleasing and sometimes, even more interesting than the original object.
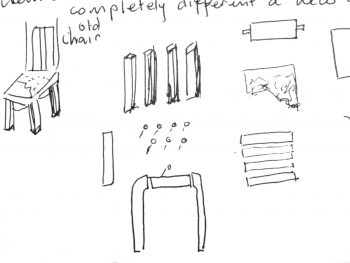
Recently, I pulled apart an old chair that had been hanging around for years. The wood was still good. The cloth and leather had grit and rust, just perfect for sculpture. The rustic bits and pieces also related to some textile fragments, I unpicked from an 1800’s, quilt topper. I’m still working on outcomes and painting has crept in too. Below are some pics of the process.
Tags: 1800s, antique fabric, Art materials, Art Projects, artist jenny davis, deconstruct, inspiration, Installation, mixed media, outlook8studio, Painting, Recycled art, Recycling, renew, rust, Sculpture, work in progress
Posted in abandoned, abstract painting, antique, art materials, art studio, contemporary art, de contructing, discarded, Found Objects, inspiration, new project, outlook8studio, recycled art, reuse, rust, sculpture, textile art, underground chambers, urban, Work in progress | No Comments »
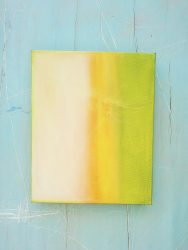
Saturday, January 13th, 2018
After, a much needed break it’s back to work for 2018. I’m getting all geared up for my next solo exhibition, in April. I’m just waiting on a paint delivery and sorting out the studio, before I start the new work.
During my break, I worked on my website and listed more paintings in my Gallery.
I will also be adding more paintings, mixed media and textile pieces shortly.
“Silver Cad Connections” 1 & 2
A static flow through and within .

“Lemon Under Cad”
It just is…
“Moment 3”
One fleeting moment. A thought caught in a fraction of time.
“Fleeting Moment 4”
One fleeting moment. A thought caught in a fraction of time.
“Fleeting Moment 5”
One fleeting moment. A thought caught in a fraction of time.
Tags: 2018, abstract art, abstract painting, art studio, artist jenny davis, Exhibitions, new exhibition, new year, outlook8studio, Painting
Posted in Abstract art, abstract painting, acrylic painting, Art Exhibition, artist studio, New Work, Painting, paintings | No Comments »
Monday, December 4th, 2017
When I first started painting, the thought of stretching my own canvas was frightening, but after a few attempts of stretching a canvas it came to me automatically. I was able to make canvases for half the price of store bought ones. Also, stretching your own canvas can trigger off the beginning of the creation through the hands on process of doing it yourself. Hope this helps.
Materials and equipment
Pre- made stretcher frame/ or self-made
Canvas material cut 10cm approx larger than your stretcher frame
Canvas staple gun
How to Stretch a Canvas
Lay your canvas on a flat surface wrong side up then lay your stretcher right side down on top of canvas. Pull the sides of your canvas up and round to the top of the stretcher.
DIAGRAM 1 Secure the 4 points with staples or tacks to create a diamond shaped wrinkle in the canvas. Check diagonals and adjust the stretcher for squareness before going further.
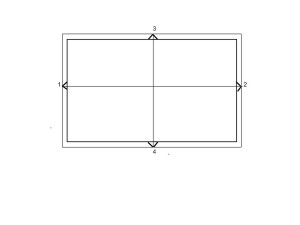 DIAGRAM 2– Secure the canvas to the stretcher with staples approx. every 6 cm. around the edge, working from the center points outwards. Pulling the canvas as you go. Continue working out to the corners in this pattern. Do not overstretch the canvas. When applying tension, the canvas pliers should not be forced to pull the canvas in place. The tension of course will become greater as you work towards the corners.
 FOLD– the corners under; as neatly as you can, leaving no exposed tab that maybe caught and damaged. Staple or tack excess canvas that wraps around to the back of the frame.
HINT– Once finished and your canvas and is not as tight as you would like, fill a small spray bottle with luke-warm water and spray the canvas on the back. Once dry your canvas will be as tight as a drum. Happy painting!
Back to Outlook8studio Tutorials
Tags: abstract art, acrylic painting, Art materials, canvas stretching, jenny davis, make a canvas, mixed media, oil painting, outlook8studio, Painting, turorial
Posted in Abstract art, abstract painting, art materials, Painting, paintingoncanvas, stretch canvas, Tutorial, Uncategorised | No Comments »
Saturday, November 18th, 2017
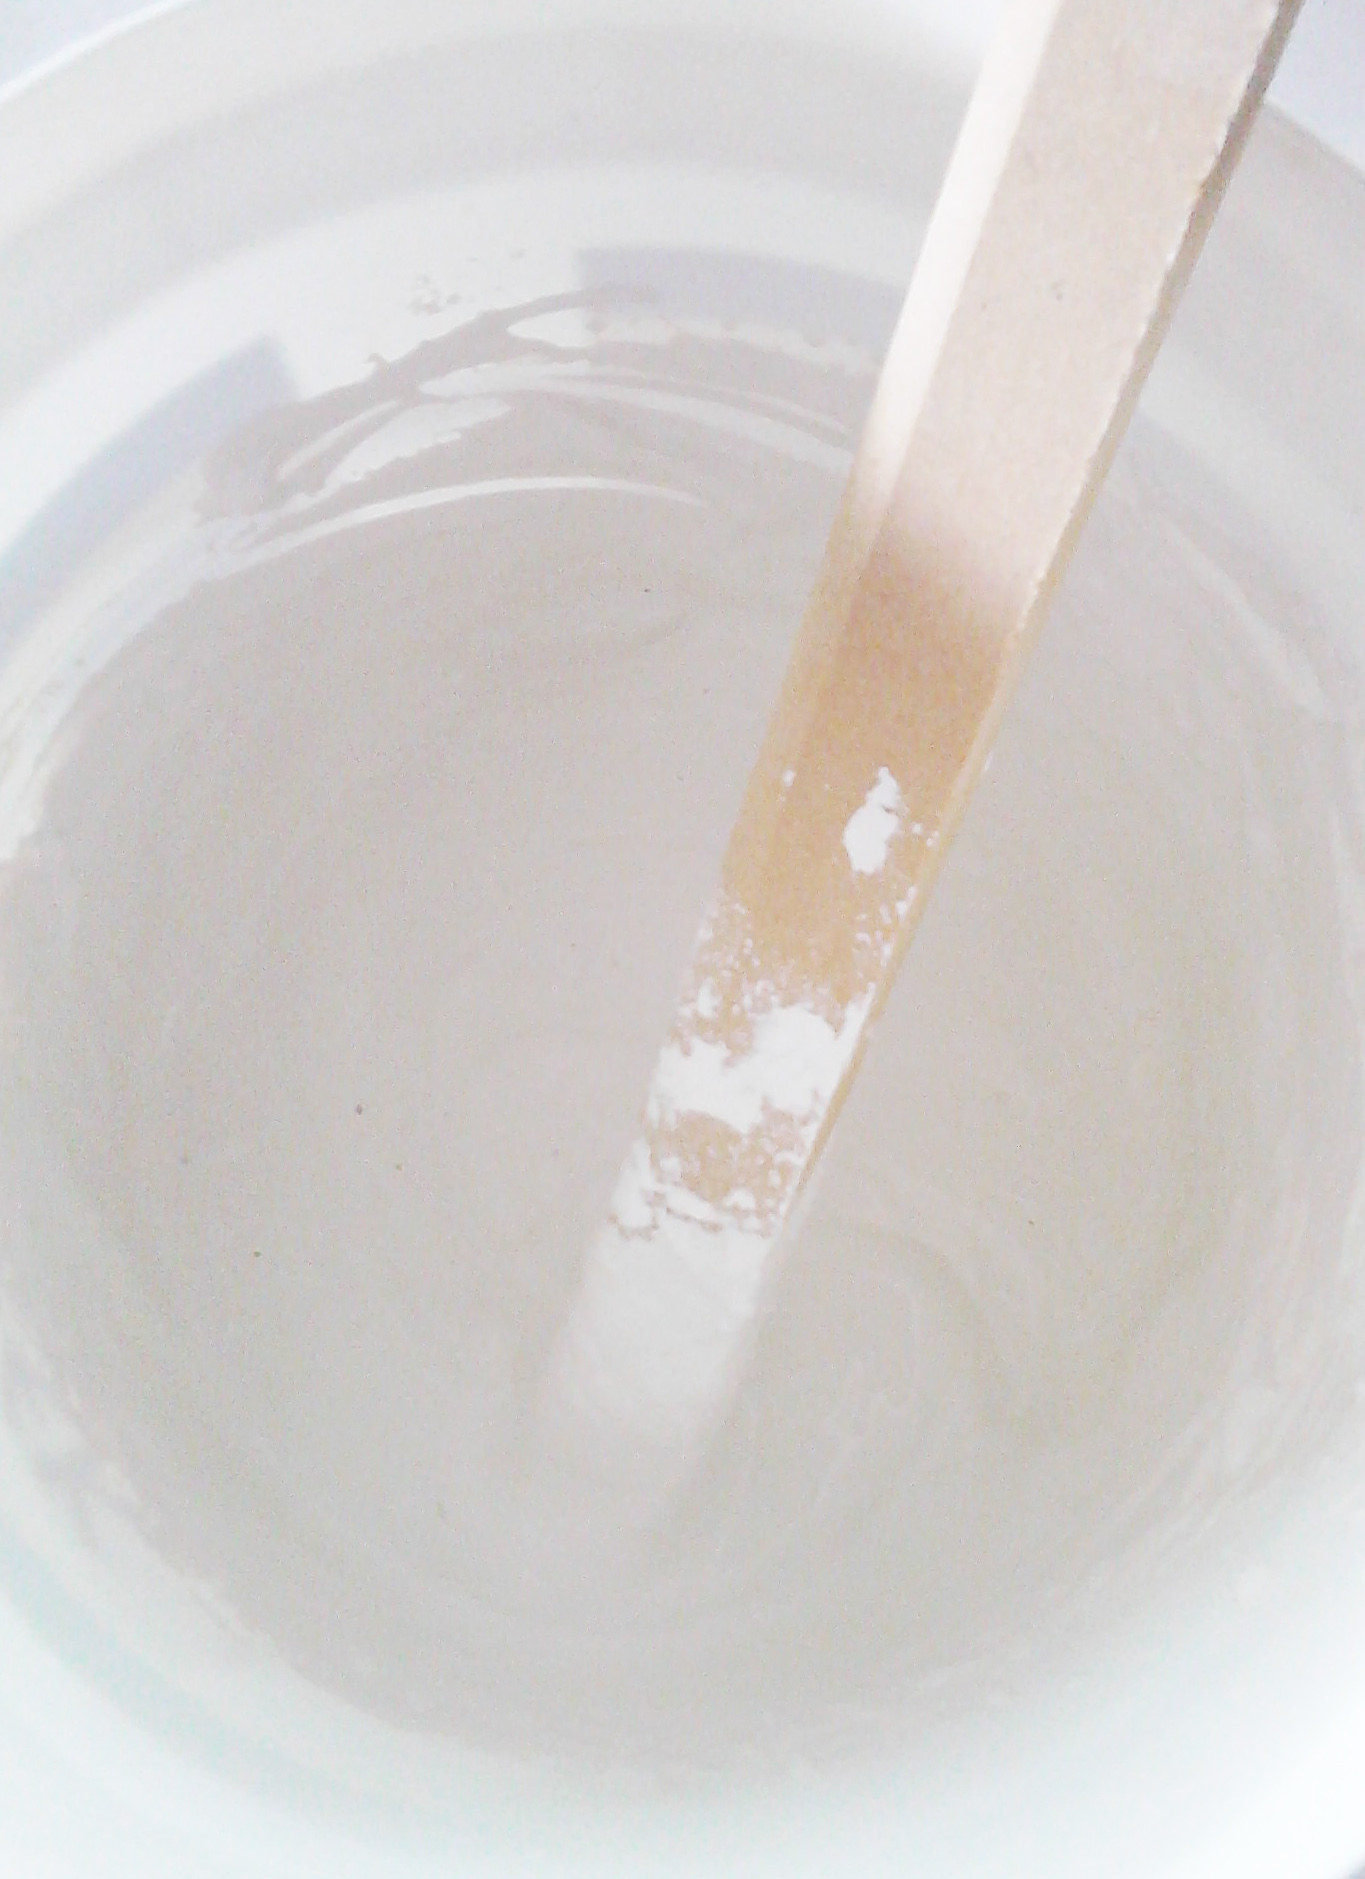
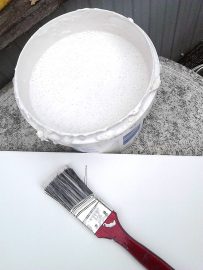
I love Gesso paint and use heaps of it in my work. It’s gritty, chalky and can be applied to artwork to give a translucent or opaque look. It’s also very expensive so I decided to make my own.

Gesso is used for many things such as a primer for canvas or on paper to give a good base for painting, drawing or mixed media work. When making collage I use it as a gluing medium to stick on papers, in-between, painting and drawing layers.
The recipe below makes 2 litres of Gesso paint
( If not using straight away, this Gesso will last approx. 4-6 weeks)
Homemade Gesso
PLASTER MIX
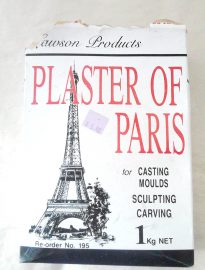
1 cup Plaster of Paris or fine white plaster powder
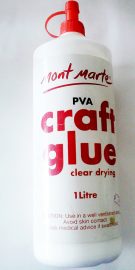
1 cup of PVA or white glue
1 cup hot water
PAINT
3 cups white acrylic paint
UTENSILS
Container, cup and mixing stick or spoon
RATIO: 1-3
Plaster Mix 1 – Acrylic paint 3
Method
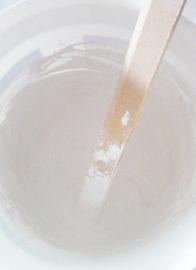
To make the plaster mix. Add the plaster to the hot water and stir ( Safety purposes: always add the plaster powder to the liquid, not liquid to plaster, as it will blow up into your face and always wear a dust mask)
Dust Mask
“Plaster of Paris” and cup
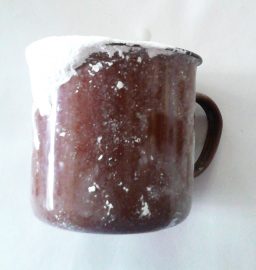
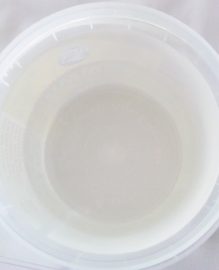
Hot water and mix
Next add the PVA or white glue, stir.
Finally add the white acrylic paint and mix. ( I used some acrylic powder paint I had and made it up with water) You can use any kind of acrylic paint or colour .
Result
I was very happy with the result. The gesso is translucent with the gritty bits I like. You can also do several layers of gesso to give a more opaque appearance. It covered my canvas very well with only 1 coat. When adding more than 1 coat you can sand in- between to give a really smooth surface for detailed work .
2 litres of Gesso
Gesso on stretched canvas

Gesso on paper
To see this and more of my free tutorials, please go to Tutorials I even show you how to make my large studio easel.
Tags: abstract art, acrylic gesso, acrylic primer, Art materials, contemporary art, homemade gesso, how to, how to make gesso, How To's, jenny davis, mixed media, outlook8studio, paint primer, Painting, painting equipment, painting on canvas, Painting Techniques, pigments, supplies, tutorial
Posted in abstract painting, acrylic painting, acrylic primer, art, art materials, canvas primer, contemporary art, homemade, homemade gesso, make paint, oil painting, paint, Painting, paintingoncanvas, Tutorial, Uncategorised | No Comments »
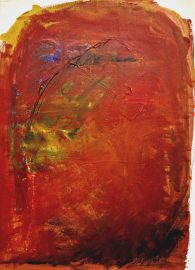
Sunday, November 5th, 2017
A few years ago, I changed from oil paints, to acrylics, after I became allergic to the turps. I’m still not used to painting with acrylics as, I just love the lushness, depth and movement of oil paints. Something, I haven’t been able to achieve with acrylics. So, recently I bought some oil painting supplies, eco friendly turps, to see, if I’m still allergic to it.
The life of a Painting.
Oil paint , medium, wax on canvas

Sometimes I think, I should stop earlier, when its fresh and spontaneous, but usually keep going. I just have to trust the process and know, that eventually, I will end up with something I’m happy with.

I will revisit the painting, in a few days time to decide, whether I will take it further. At the moment, I’m feeling, times long past.
Tags: abstract art, abstract painting, Art materials, art spectrum, artist jenny davis, contemporary art, experiments, oil painting, oil paints, outlook8studio, Painting, work in progress
Posted in Abstract art, abstract painting, New Work, oil painting, Painting, paintingoncanvas, Work in progress | No Comments »