Posts Tagged ‘Recycling’
Monday, April 14th, 2014
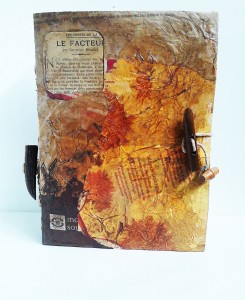
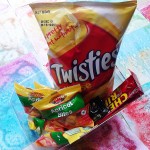
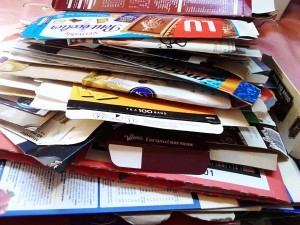
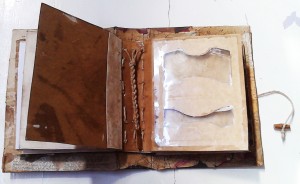
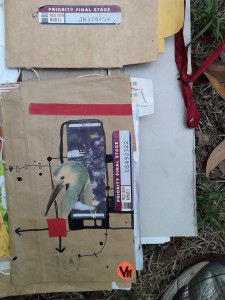
I love to recycle packaging, junk mail and advertising materials into books
I like the freedom of designing my books as I make them, discovering ideas along the the way
Its amazing how much packaging can be saved over time

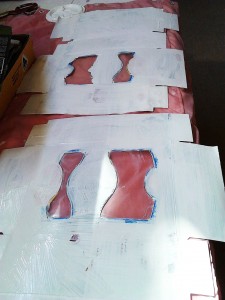
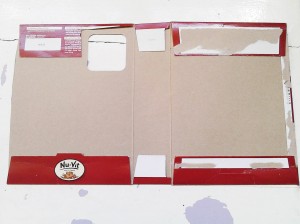
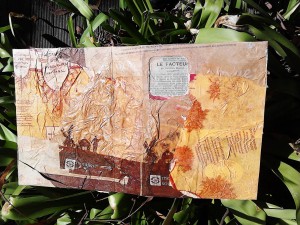
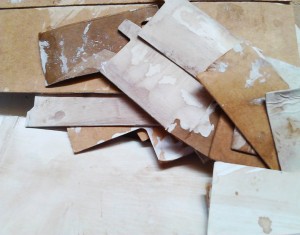
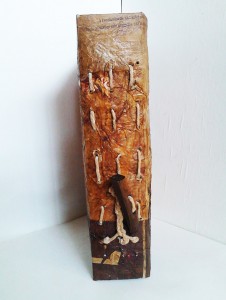
For this book I used cereal packaging with a peephole and pasta boxes with acetate windows for the interior pages
and sealed the pages with white Gesso
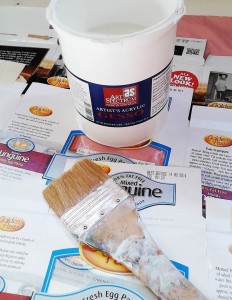
only on one side because I liked the dark look of the cardboard ( later I painted them with Parisian essence to age )
On the cover I used double sided tape to stick down the tabs
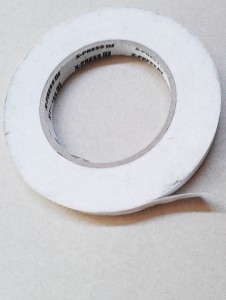
to make it more sturdy
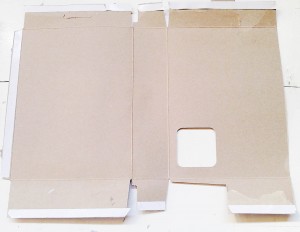
The little window will have something inside
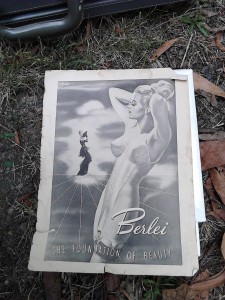
Taking a load of baguette bags I bought back from France
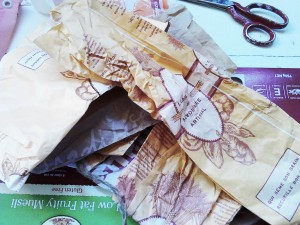
I scrunched them up into balls and wrinkled them
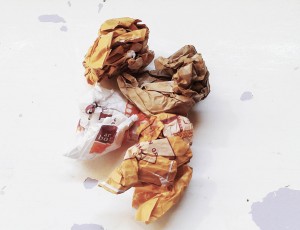
opened them up and stuck them to the cover packaging with pva glue
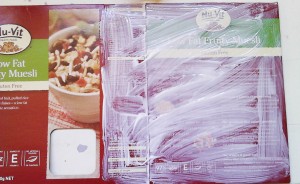
This gave the cover an oldish feel with a lovely rough texture.French text shows through the window
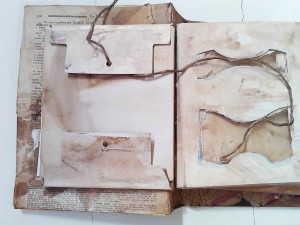
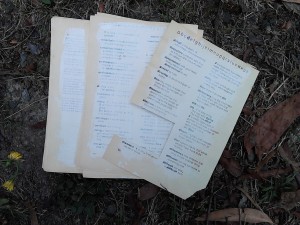
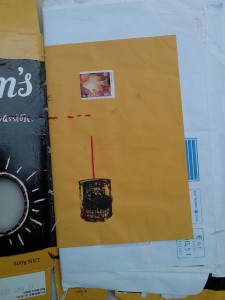
I covered the inside with some French text from a 1900’s magazine, stamping and my hand drawn doodle drawings.
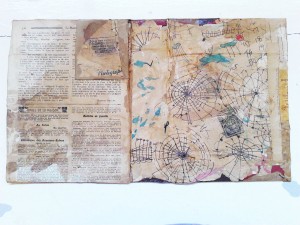
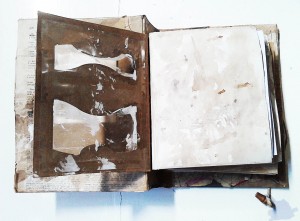
I didn’t like the brightness of the gessoed pages so aged them with washes of Parisian essence
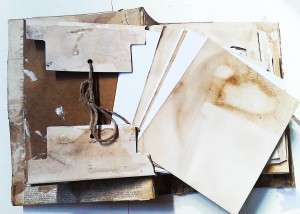
When dry I cut off some of side flaps from the inside pages saving them for tags and pockets later
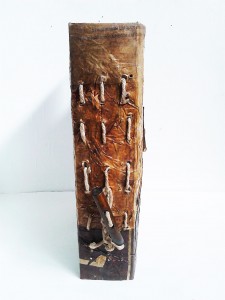
I didn’t have an awl to make the holes for binding the book, instead I used a hammer and nail. It worked fine
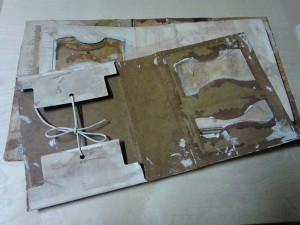
I punched 3 rows of holes weaving in and out with cotton mop thread

leaving a tail inside I then plaited the threads and added a piece cardboard for a bead thing
The extra holes seen were a mistake and can be covered up with more baguette paper and glue later
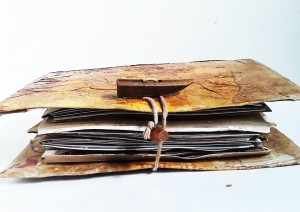
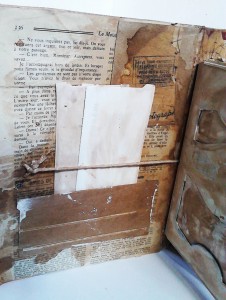
Side flaps on some of the pages hold piles of water colour papers for collage and drawing
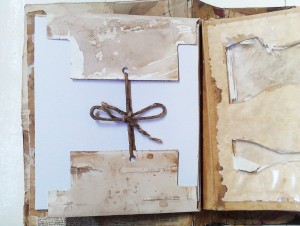
They are tied with cotton mop thread
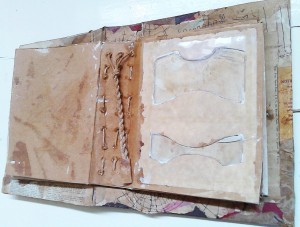
The loose water colour papers are white and hand dyed with Parisian essence
See through windows add more interest
Pockets and string hold found papers and tags. The book is still not finished and I will probably add more tags and pockets
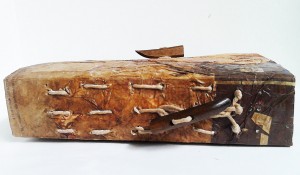
Toggles were sewn on the front with a string to close

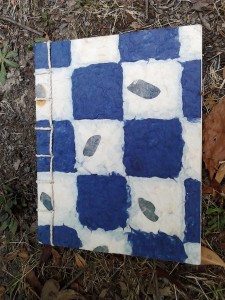
This book has a Japanese feel to it and measures 24 x19cm. 5 pockets hold 40 pieces of water colour paper with another 12 pages. Some have windows.
I try to keep on top of my collecting by making something with the packaging every few weeks.
What do you make from your junk?
Tags: affordable art, Art Books, Art Books, Art materials, artist book, Artists books, blank handmade book, Books, collecting, contemporary artist Melbourne Australia, eco- friendly, French, handmade, handmade book, handmade books, handmade journal, handmade journal junk journal, how to, how to, Ideas, inspiration, jenny davis, junk book, packaging, Recycled art, Recycling, reusing junk, Street art, street litter, supplies, Uncategorised
Posted in Artists books, handmade books, packaging, street litter, Uncategorised | No Comments »
Saturday, March 8th, 2014
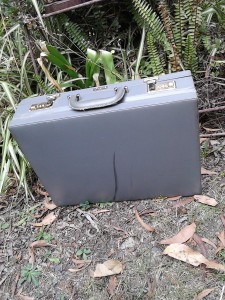
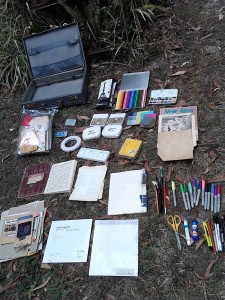
Wherever I go I like to have all my art materials in one place encase I need to jot down an idea, or for when I get that creative burst.
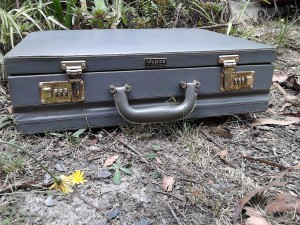
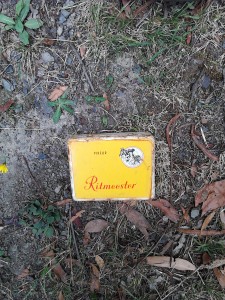
So, when I found this old case I knew exactly what I would do with it. I made myself a personal art kit for when I go out and about. I keep this case in my car and it goes everywhere with me. I also have a smaller kit for when I travel overseas. This kit is much lighter so I can collect art materials along the way
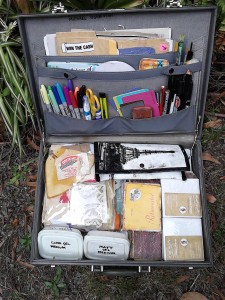
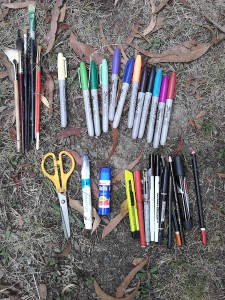
It has everything I need for drawing, painting, collage, photo transfer, stamping and writing
In Transit series of collages
Acrylic paints and ink in a pouch my daughter gave me
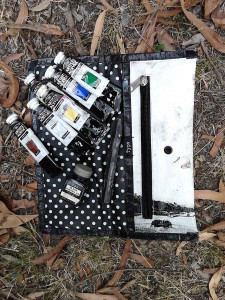
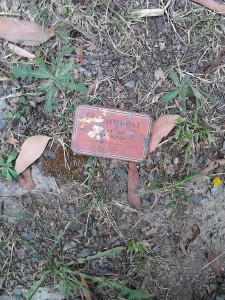
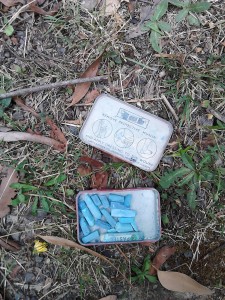
Chalk in a vintage medical tin
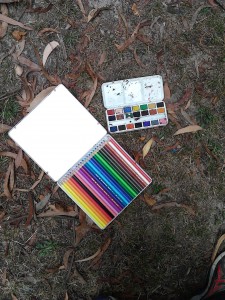
Water colour paints, coloured pencils and double sided tape

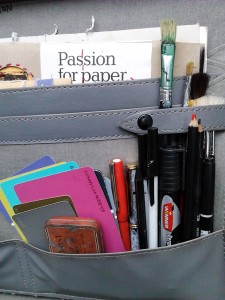
Brushes for painting, pens for drawing and writing, felt pens, graphite pencils, knife, scissors and glue stick for collage
Paint swatches

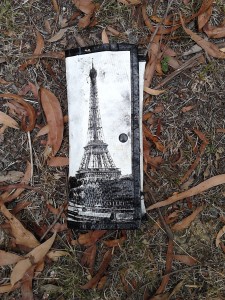
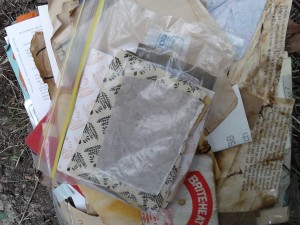
Collage papers in a plastic pouch. Mixed lot of vintage and newer papers
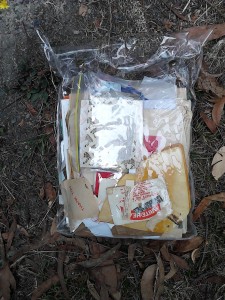
Hand- dyed coffee filters, vintage wallpaper, labels and book pages
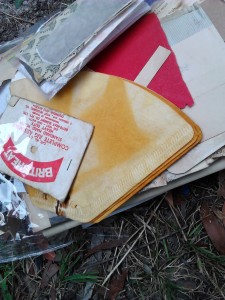
Stained printed matter and newer papers
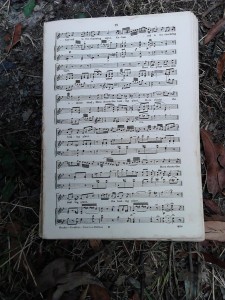
Old music prayer book
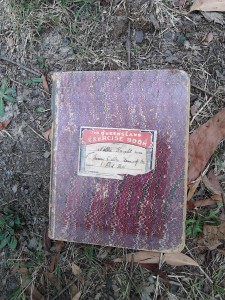
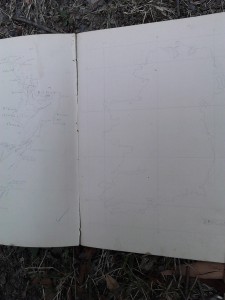
1932 school book full of hand drawn world maps
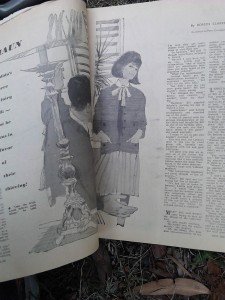
1960s New Idea magazine for cutting
Old advertising
Vintage encyclopeadia pages sealed with a layer of translucent gesso paint
A book of hand-made French paper
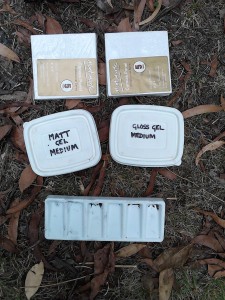
Small canvas boards and palette, matt and gloss medium for collage, painting & transfers
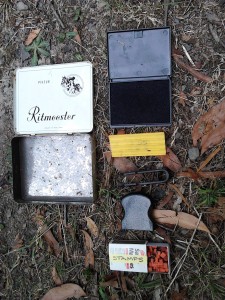
Mini stamping kit in old cigar tin
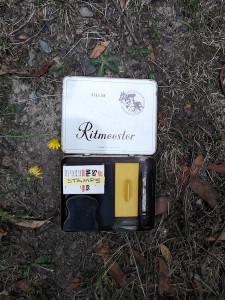
Stamp pad, tiny rubber text stamps in matchbox, stamp holder and tweezers
I also carry a selection of my hand made artist books in progress to work in.
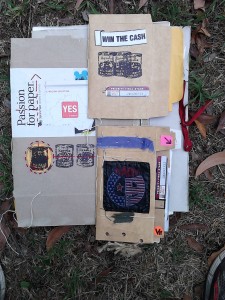
My books are made from found papers, junk mail, advertising
used envelopes, cereal boxes and food packaging

Embellished with used clothing labels, tags, stamps, stickers, pen ,ink and found fabric scraps

sewn with thread or wire and filled with whatever else I find in my travels
It’s amazing how much I can fit into the case
Do you have a portable art kit ? Whats in your art kit ?
See Jenny’s portfolio here
Back to “Free Tutorials”
Tags: abstract art, abstract art, Art Books, Art Books, art kit, Art materials, art on the go, art packing, art studio, art studio, art studio storage, artist kit, Artists books, ArtsBus, Collage, collage materials, collecting, collecting art materials, craft materials, creating, creating on the move, creative ideas, jenny davis, nomad art, outlook8studio, Painting, portable studio, Recycled art, Recycling, storage ides, studio, travel, travelling art kit, travelling artist, Uncategorised, vintage case ideas
Posted in art kit, artist kit, Artists books, ArtsBus, creating, nomad art, travel, Uncategorised | 2 Comments »
Friday, February 7th, 2014
Drawing & Collage on Vintage Index Cards.
“Indexing” a series of small abstract drawing & collage
Size 20 x 13cm.

collage with vintage found papers
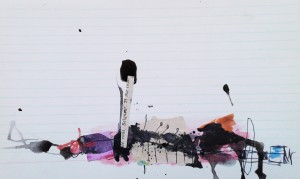
watery black ink & pen

tissue and hand drawn doodles

original vintage French script

with oil pastel on old index cards
Tags: abstract art, affordable art, Art for sale, artist jenny davis, collage, collecting, contemporary artist Melbourne Australia, creating, Drawing, eco- friendly, french script, handmade, hndmde collage, Ideas, inspiration, jenny davis, mixed media, original collage, outlook8studio, Painting, Recycled art, Recycling, street litter, Uncategorised, Vintage fabrics, vintage finds, vintage papers, vintage wallpaper, Work on paper
Posted in Uncategorised | No Comments »
Tuesday, January 14th, 2014
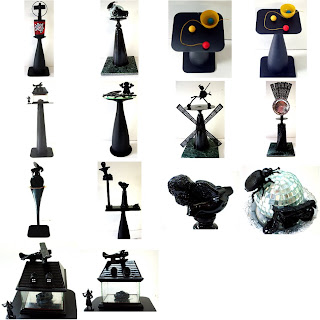
Vintage metal drill tin, broken ultra marine glass from an old bottle and a little cherub. All spray painted black.
Old Japanese music box, plastic toy cowboy, American flag on laser cut metal.
Plastic music box ballerina, rock, metal gear, wire on laser-cut metal
All sculptures are works in progress and unfinished….
Tags: abstract art, abstract art, found object, jenny davis, new sculpture, new work, recycled, Recycled art, Recycling, recycling art, reusing scraps, Sculpture, Sculpture, sculpture process, Uncategorised
Posted in Uncategorised | No Comments »
Wednesday, November 6th, 2013
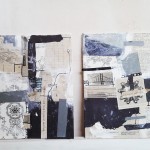
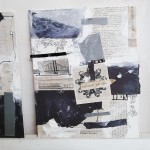
Black and white study for the collage course I’m doing. We were asked to create a collage using only black and white materials. I loved this exercise and found myself wanting to add some colour…I couldn’t resist and made 2 collages.
I collected 2 canvas boards, black and white vintage papers, wallpaper and newer paper
As in abstract painting, I like to work quickly and not worry too much about leaving marks and splotches as I’m doing. In some areas I made marks with felt pens and white gesso paint trying to blend the different textures and areas.
I also explored Stephanie’s idea and used some glitter paint mixing it with gesso so it became a greyish colour. I like the end result but may go further and sand back the whole lot, giving it a worn-out appearance.
Tags: 30 days of collage, abstract art, abstract art, art class, collage, collage course, creating, decorating papers, design ideas, handmade collage papers, inspiration, new work, original collage, painting papers, Reclaimed art, Recycled art, Recycling, reusing scraps, Stephani Levy collage papers, Uncategorized
Posted in creating, Reclaimed art | 2 Comments »
Tuesday, November 5th, 2013
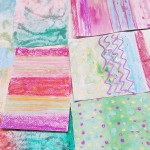
My first practical day of the “30 Days of Collage” by Stephanie Levy course.
It was Melbourne Cup Day so this was a good excuse for me to grab a (naughty snack attack) stash to help me along with my artplay day. I gathered all my paints , crayons, salt, tapes and began.
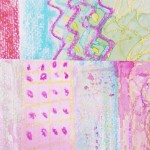
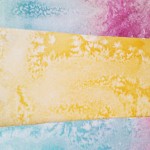
The first lot of images are the process using, paint with salt, glue , tape, pastel and more…The second lot of images are the finished result.
What a fun way to get a big bunch of gorgeous papers together for creating collage and books !
and a few more papers felt pen, masking tape and water
Tags: 30 days of collage, art class, Art materials, collage, collage course, collage sheets, collecting, craft materials, craft project, creating, decor, Decorating, decorating papers, design ideas, handmade, handmade collage papers, handmade journal, inspiration, painting papers, Recycling, reusing scraps, Stephani Levy collage papers, supplies, Uncategorized
Posted in creating | No Comments »
Saturday, November 2nd, 2013
On Monday I start a new art course, “30 Days of Collage” by Stephanie Levy

Image copyright Stephanie Levy 2013
I love creating collage and think this course will help me to free up to experiment and play instead of being so serious and restricted when creating collage. I want to feel free to play with the process without worrying about the end result. Just like when creating my abstract paintings
I love Stephanie’s Art and thought her course would be perfect for this.

Image copyright Stephanie Levy 2013
I’m really looking forward to the interviews with 10 top collage artists from around the world who will share their tips and give us peeks at their art and arts practice.
We will be creating our own collage materials and learn how to decorate and paint our own unique papers. As well, I get to recycle and use up, my huge collection of vintage papers, fabrics, wallpapers and junk to make beautiful artworks and make room in my studio for new art projects.
Tags: 30 days of collage, art class, collage, collage course, collecting, creating, Creative business, Creative women, decorating papers, eco- friendly, French collage, handmade collage papers, home decor, original collage, Painting, Painting, painting papers, recycled, Recycling, recycling art, reusing scraps, Stephani Levy collage papers, Uncategorized, vintage finds, vintage wallpaper, Work on paper
Posted in creating | 2 Comments »
Wednesday, April 25th, 2012
POCKET ART SERIES
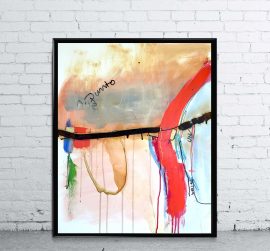
Small one of a kind transportable patches of Abstraction ready to go…Compact pieces of art for people on the move. My pocket art pieces came about when I needed to transport artwork from country to country. They are small mixed media textile pieces connected to my love of abstraction textiles, text and street art.
Walking my way across the surface I use coloured wools and wires as I would my paintbrush or charcoal, adding, whatever interests me at the time including, advertising papers, cards and packaging from Paris

RUE PIERRE

OOH LA LA

HEARTS IN PARIS

TOURISTS
Each one is a tiny 3.5″x2.5″ – 9x7cm and they come snuggly displayed in a clear acrylic card holder
MATERIALS
Indigo blue denim
canvas cloth
wire
press stud
button
paris clothing label
originalParis stamp
Colored wools
found fonts
Acrylic sealer and more….
SIGNED and DATED by the artist
I really had fun creating these pieces and were created with a lot of care
Tags: aceo, Art materials, collecting, Craft, Craft for sale, craft project, Crafts, French, French inspired, packaging, Paris, reclaimed, Reclaimed art, recycled, Recycled art, Recycling, recycling art, reusing scraps, Textile craft, textiles, trash, Uncategorized
Posted in Craft, packaging, Paris, Reclaimed art, textiles | No Comments »
Saturday, February 4th, 2012


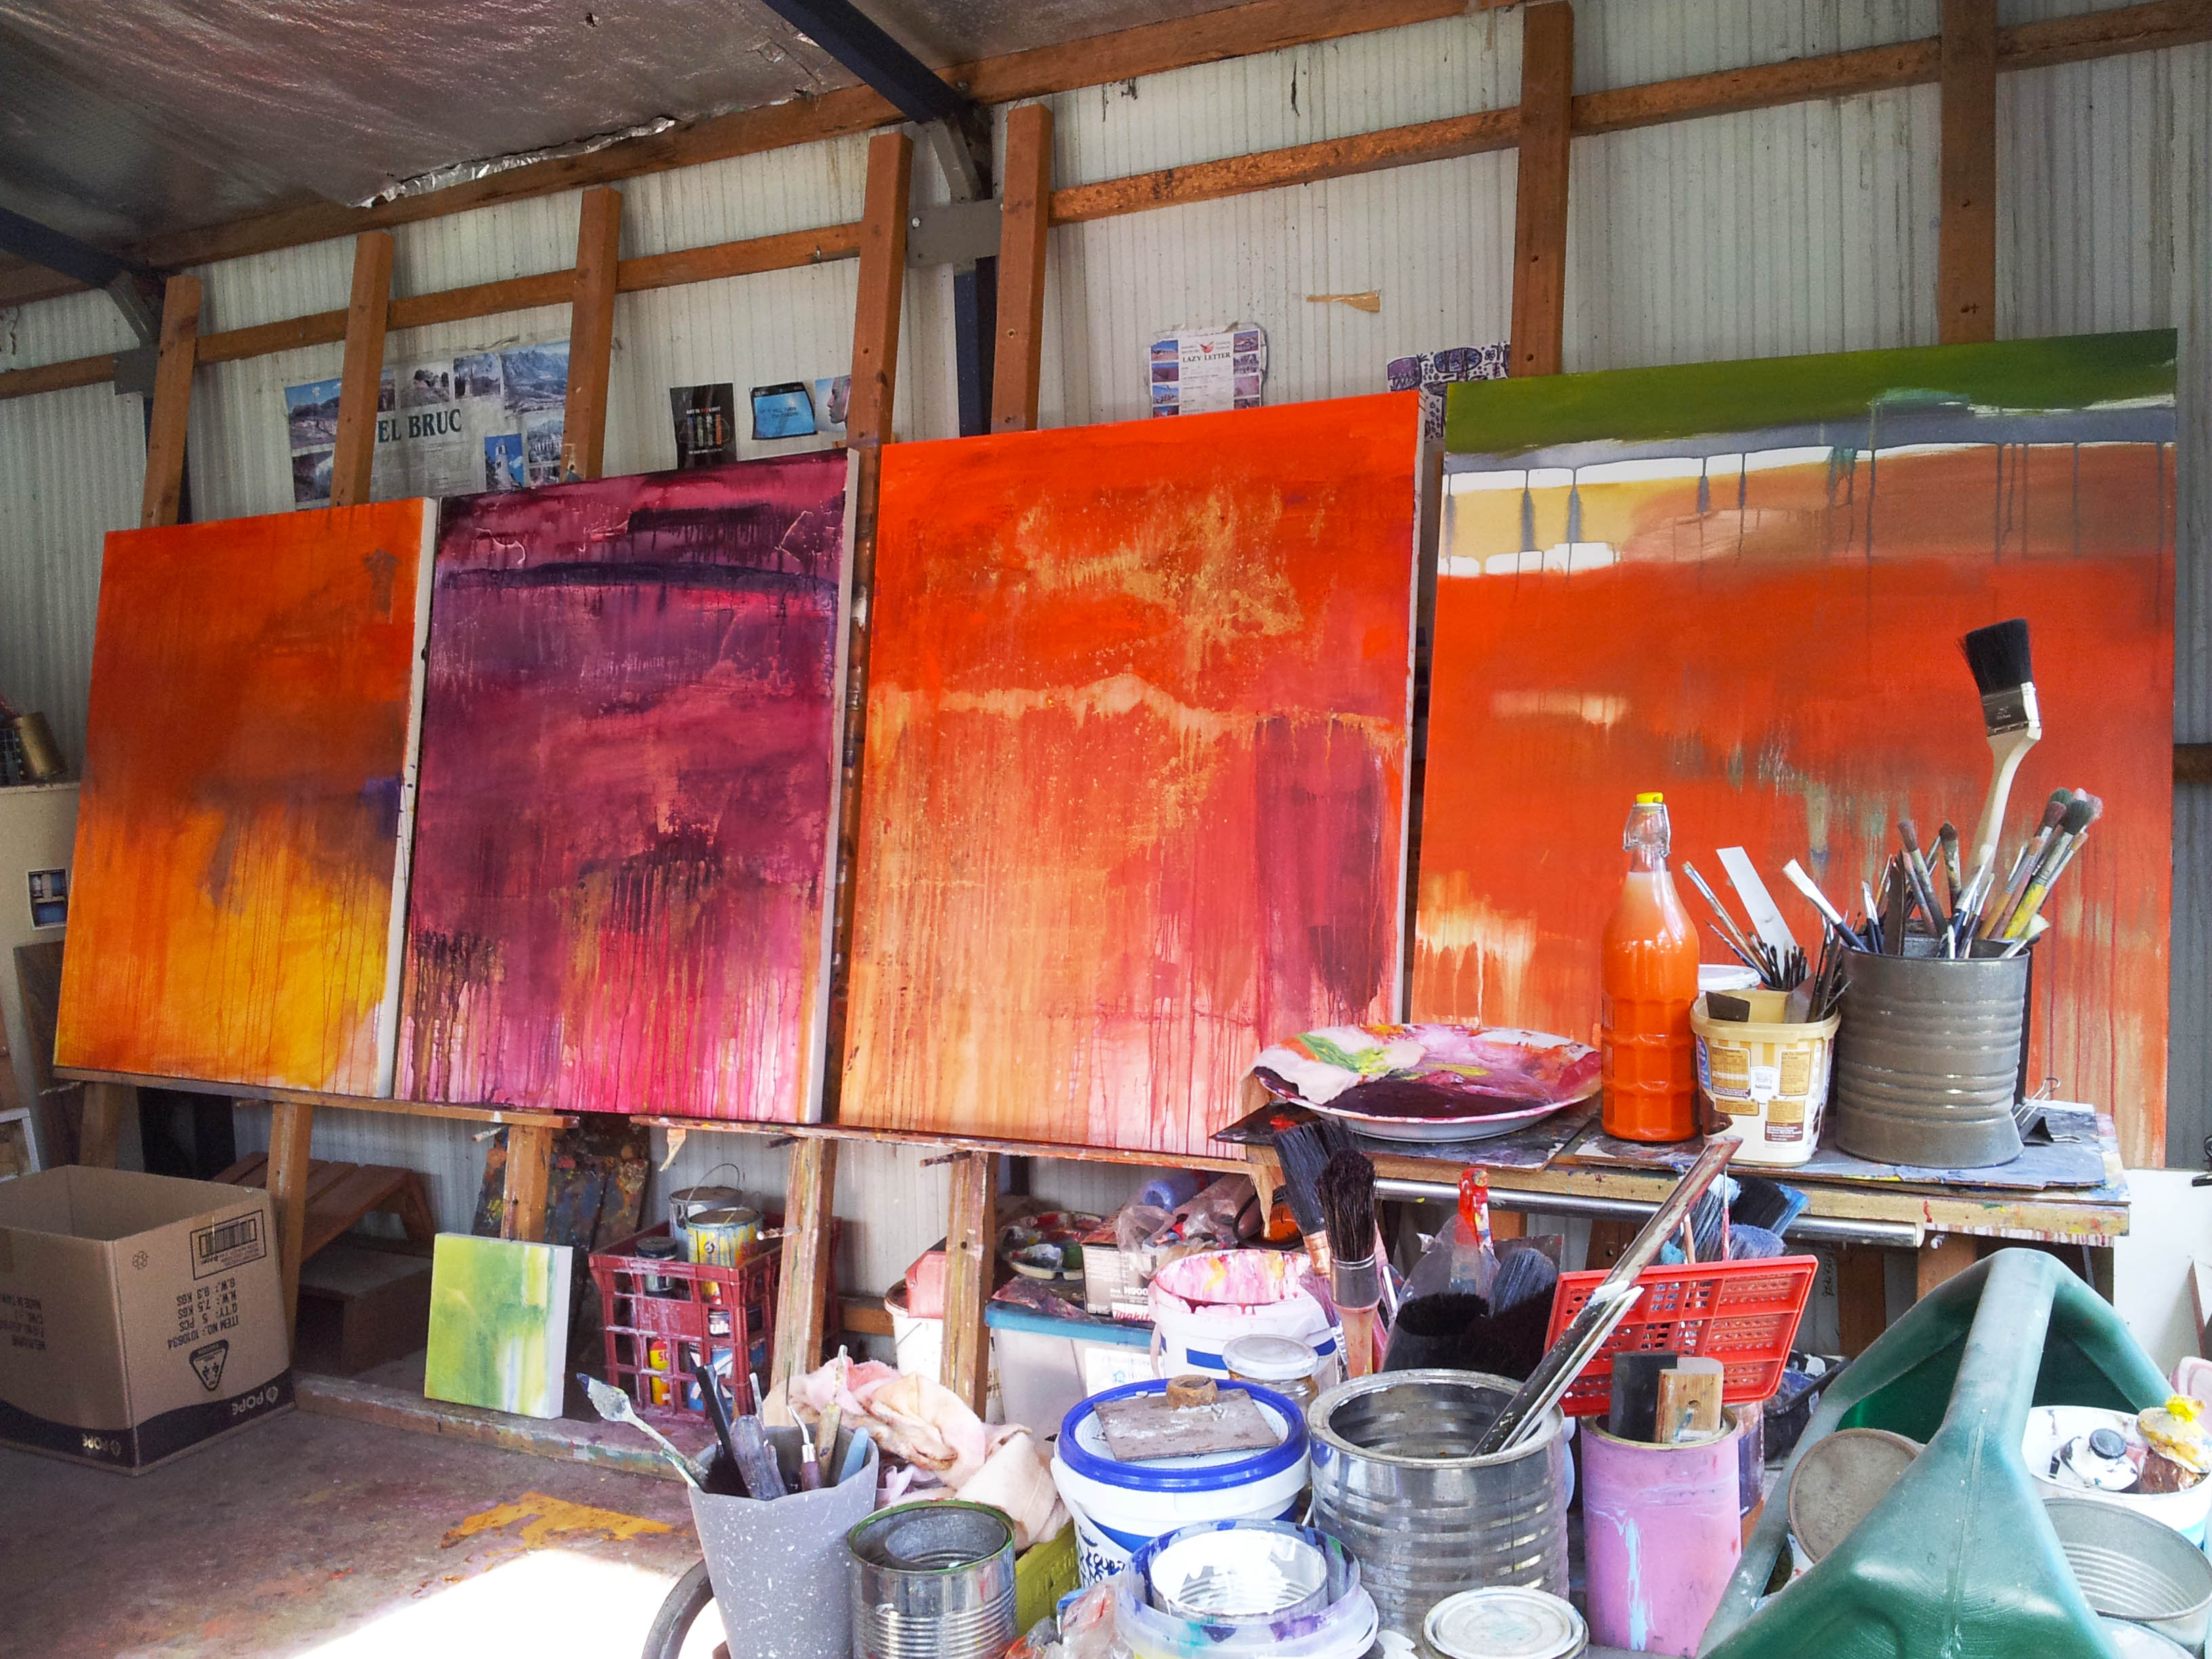
How to Make a Large Studio Easel in 6 Easy- Peasy Steps
When I built my studio years ago, I needed to have a versatile easel. I couldn’t find anything suitable in the shops and my budget wouldn’t allow for much. So, I went about creating one from my left over pieces of timber. I needed one that would take small to very large canvas’s all at once. I needed lots of space too. Being an abstract painter, I slosh paint and work very quickly, sometimes on many canvas’s at once. I wanted a permanent spac,e where I could work on small canvas’s 30x30cm up to very large ones 4 x 2 Meters . My easel ended up being 9 meters long x 4 meters high and after 12 years of daily use, my rough and ready easel is still going strong.
My simple Plan
Materials & Equipment
Cut yourself, or buy 2 equal lengths of hardwood or pine, however long you want the easel to be. This is for the floor and wall runner that will hold all the upright struts.
Cut yourself, or buy equal lengths of hardwood or pine for the uprights. Decide how many uprights you want to hold your canvas .To get the length of each piece , measure from floor to top wall at the angle you want the easel to be.
Bolts, nails or screws
Wooden dowel lengths of wood for pegs
Drill with a “spade” drill bit the same circumference as the dowel pieces you have
(Spade bits are used for rough boring holes in wood.)
Tape measure
Hammer
Drill
Method
1.Everything will need to be measured and cut for the area your are working on.
2. Grab the floor runner piece, lay it perpendicular to the wall on the floor, judging the best space between the floor runner and the wall . Screw, bolt or nail to the floor at intervals to secure. (Note) Remember to allow enough space from floor runner to wall for a slight angle for the upright pieces of wood so your painting canvas can to sit without falling

3. Grab the wall runner piece and screw, bolt or nail to the upper wall at intervals and make secure.

4. Lay all your upright pieces of wood together on a flat surface together (floor )and take your drill with the spade bit and make holes from bottom to the top on all the lengths of wood. The spacing has to be equal across the whole lot.
(If painting the easel do this now before attaching to wall)
5. Take your pre- cut lengths of wood with the holes and sit each one so the bottom is sitting behind the attached floor runner and at the top against the wall runner with the holes facing you. Screw bolt or nail the upright struts to the floor runner and to the wall runner at top. (Note) Go along the floor runner at whatever spacing you want with the upright struts to be.

Almost done. Cut lengths ( 6inches) of dowel for the pegs that will hold all your canvas’s

Note: If the pegs don’t fit in the holes… Round off one end with sandpaper by hand, or with an electric sander.
All done!!! Now grab your canvas and paint to your hearts content
Tags: abstract art, Art materials, art studio, artists studio, ArtsBus, creating, creative space, easel, how to, how to make a studio easel, How To's, jenny davis, large canvas easel, outlook8studio, Painting, painting easel, painting equipment, Recycling, studio, studio design, studio easel, Uncategorised
Posted in ArtsBus, creating, Uncategorised | 5 Comments »
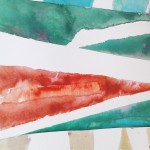
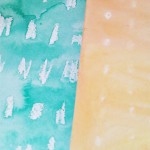
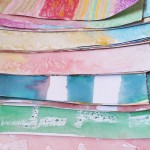
Tuesday, October 4th, 2011
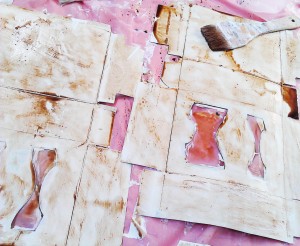
Lately I’ve been experimenting with natural dyeing processes for fabrics and papers. I’m trying out rust dyeing at the moment. I want to build up a collection of natural and rust dyed fabrics and papers so when my next creative spurt comes around, I’ll have plenty to work with.


Over the years I have collected heaps of metal for welding my sculptures so have plenty bits hiding on my property just rusting away. The gathering of the metal objects, wrapping them with the fabric spraying with vinegar and binding with rope and wire is quite relaxing. I call it mummy wrapping.


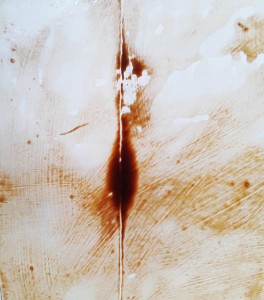
It only takes a couple of hours for marks to appear but I like to keep mine for up to a week or two so I can get deeper impressions and colours. I discovered if I wrap fabric around old pieces of copper pipe the amazing green and red patinas are transferred to the fabric as well.
I’m happy with the end result and see connections to the abstract marks I create in my paintings. There are paintings in themselves
Go to my tutorial on Rust Dyeing here
Tags: Art materials, artist mayterials, collage, copper pipe, Craft, creating, dyeing, fabric dye, Fabric dyeing, how to, how to rust dye, inspiration, jenny davis, metal, natural dyes, Painting, Recycling, rust, Rust dyeing, rusty fabric, textile art, textiles, tutorial, Uncategorised
Posted in Craft, creating, textiles, Uncategorised | No Comments »
Saturday, June 27th, 2009


DIARY ENTRY 2005“Surfaces tell the stories of History’s children. I travelled the surface of the battles. Napoleon and Hitler’s slaughter. The senseless bloodshed of scores of the Holy wars. As I entered the borders it invaded my skin, then, seeping into my soul, I saw where it happened over and over again. It clings to me and will stay.
In England I saw a ghost in nave at Canterbury Cathedral and visited the wonderful sea side village of Rye. Nearby the weird, bizarre but wonderful Dungeness. And the fantastic museum in Maidstone where I was the only one, creeping through the old corridors. I loved its ancientness.
In Spain, I felt the genius of Dali, Gaudi , Miro, Picasso and Antoni Tapies.The magic of Don Quixote, Flamenco, the dance and Catalan language.
I had fun with Tarrentino’s, Pulp Fiction in France and the beautiful city of Paris with its beautiful goldness, but no toilets. I fell in love with Venice , Florence and the Renaissance. The architecture cathedrals and more.”
Tags: Art for sale, Art for sale, Art Projects, ArtsBus, collecting, Craft, Europe, Exhibitions, Exhibitions, News, Paris, Recycling, Sculpture, Sculpture, Spain, Uncategorised
Posted in ArtsBus, Craft, Europe, Spain, Uncategorised | 1 Comment »
Sunday, March 8th, 2009

Letters from the Border Jenny Davis
The flower rose from the desert floor
Pushing its way through the dry hard crust like a white rag flapping its surrender into the dust
Time slowed to a halt for one soldier he clicked the camera.
An interruption to the vile slaughter he had witnessed earlier that morning
The image arrived penetrating the depths of her soul for she knew the little desert flower from the border would change the fragility of humanity forever


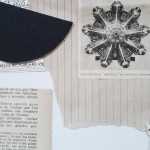
Finally after all the fires in Victoria I’m starting to create again and catch up with my work in the studio. Pictures above show images of the hubcap I created for the Landfillart project in US.
ABOUT THE ARTWORK
LETTERS FROM THE BORDER is actually a series of many pieces I have been working on for years…..This piece is a collage of images taken from my collections.
A copy of an original Imperial letter from Berlin I own dated early 1900’s
A piece of writing I created in 2003 in connection to Iraq Photos and emails I received from a US soldier when he was on the border in Kuwait waiting to invade Iraq.He described to me what happened to his troops on that day and night.
They were bombed 30 times as they crossed the border.
We conversed with emails for a few months then nothing .I don’t know what happened to him I haven’t been able to find out.
The bomb like image is a photo of a plastic toy I have that sits inside one of my box sculptures.The soldier images are from the photos he sent me of himself and his crew. I had made a few zines out of these images then I tore one up for this work. It was all originally on stretched canvas but I cut it out for the hubcap and sealed it….
The desert flower refers to a photo he sent me as he was entering over the border into Iraq…a little flower a glimmer of hope in the dry dusty desert
ABOUT THE PROJECT
Landfillart is an international effort encompassing one-thousand-forty-one (1,041) artists to claim a piece of rusted metal garbage and create fine art.
The ultimate goals of this project are twofold. The first is to compile a book with the story and photos of the evolution of http://www.landfillart.org and the coming together of 1041 artists worldwide for a common cause, making great art out of rusted refuse. Only artists could lead such a charge. The other goal is to select 200 of these metal canvases to travel and inspire other such movement
Tags: 1900's writing, Alternative spaces, Alternative spaces, Art for sale, Art for sale, art gallery, Art Projects, artist jenny davis, ArtsBus, berlin, bomb, BORDER, box sculptures.This crew. zines stretched canvas, car, Charity, collecting, collections. original, contemporary art, Contemporary artist, contemporary artist Melbourne Australia, corporate art, desert, desert flower, Exhibitions, Exhibitions, Fun Stuff, hubcap, Imperial letter, Installation, Iraq, Iraq Photos, iseries, jenny davis, Landfillart, LETTERS, News, Painting, Painting, Photography, plastic toys, project, recycle art, Recycling, Resources, Sculpture, Sculpture, soldier, troops, US, when he was on the border in Kuwait
Posted in ArtsBus, Charity | No Comments »