I created 4 more pages today in my little cloth book. Adding to this little book bit by bit each day, while in isolation.
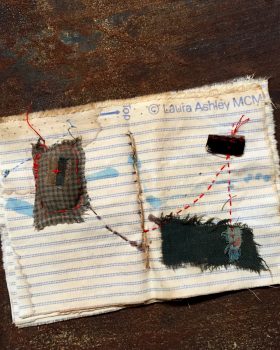
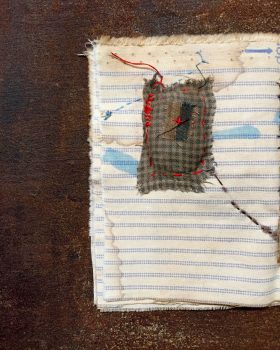

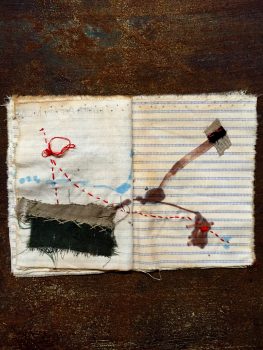


I created 4 more pages today in my little cloth book. Adding to this little book bit by bit each day, while in isolation.


Vintage Pulp
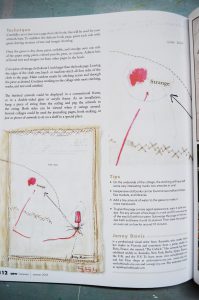
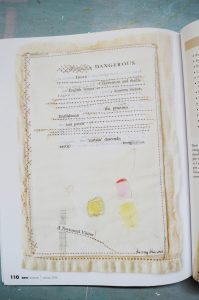
As, mentioned in an earlier post , (Vintage Pulp Fiction Collages) here are some photos of my published article last year, in “Sew Somerset Summer 2016” magazine. (Now Sold Out) I have also included below, how you can to make your own mixed – media collage and drawings from damaged books. I get really addicted to making these little artworks and love reclaiming, tattered books, destined for the garbage, giving them a new life.
Supplies:
Supplies:
Damaged vintage “Pulp Fiction” books, or any other book
Acrylic gesso paint.
Coloured pencils, pens, inks, crayons etc. (I wouldn’t use felt pens as they might seep through)
Vintage fabric. (Damaged, stained, vintage tablecloths, tea towels, even old doilies)
Glue stick
Needle
Threads (any colour)
Equipment
Cutting mat
Box knife or scalpel
Scissors
Sewing machine (Optional)
Small cheap paint brush or, sponge brush
A few rags for wiping paint or glue
Instructions
Carefully cut or tear out a page from the book. This will be used for your artwork base.
To stabilize the delicate book page, paint each side with acrylic Gesso paint, leaving sections of text, and images showing.
Now for the fun part. Once the Gesso paint is dry, draw, paint, scribble and smudge, onto one side of the paper only. You can use paint, coloured pencils, ink, pens etc. Start gluing on bits of found text and images, cut from other pages in the book. It doesn’t have to make sense. It’s fun creating nonsense “gibber jabber”
Next, cut a piece of vintage cloth, about 1 inch – 2cm. larger, than the book page.
Leaving the edges of the cloth raw, hand or machine stitch the cloth to the page, on all 4 sides. Without being too precious, make random marks, by stitching and detouring across and through the piece, as you like.
Continue working on the collage with more stitching, marks and text, until satisfied.
Note: On the underside of the collage the stitching will have left some very interesting marks. Two artworks in one!
Displaying your artwork
The finished artwork could be displayed in a conventional frame, or in a double sided, glass or acrylic frame. As an installation, hang a piece of string from the ceiling and peg the artwork to the string. Both sides can be viewed when it swings around. Several collages could be used for journal pages, book making, or just as a piece of artwork to sit on a shelf in a special place.
Tips
Using damaged vintage books and vintage fabrics, adds to the character of the artwork and saves it from landfill.
Collect found papers, textile scraps and text to make collage.
Old books can be found cheaply, from second-hand shops, flea markets and library throw outs.
A sharp scalpel is very good for cutting close to the book spine.
Add a tiny amount of water to your Gesso paint to make it more translucent.
To give your page a more aged appearance, stain with a tea dye. Put any amount of tea bags in a sink, 1/4 filled with hot water. Plunge and leave until stained, then bake the page in a low oven for around 10 minutes.
Hope you enjoy creating your collage.
Still working on small textile collages.
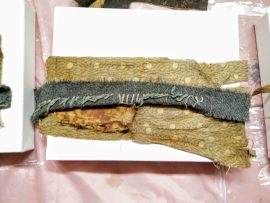
I found an old army blanket from my childhood and couldn’t resist it’s raggedy worn, loveliness and further rusted it. Leaving it in the elements outside for a few weeks.
It can take ages moving pieces around to get the right composition.
then sometimes it just happens straight away.
Adding more marks…
The good thing about using a stretched canvas as a base, I can stitch right into it.
Just like using a embroidery hoop.
Building Layers. Mixed Media. Cradled Boards.
Mixed-media art works on cradled birch boards, I started a few weeks ago.
Working on board allows me to scrape back, sand & scratch into the surface
I have left areas raw to show the grain. Building layers with shellac stains, found papers and textiles.
More oil pigments, graphite dust and inks.
I may add some encaustic wax, as well.
See the beginning of the series here
My 10 quick thoughts on creating original collage.
1. Just when you think you’ve got it licked, it can change, by adding one tiny piece of paper, or mark.
2. Collage can’t be controlled, trust in the doing.
3. If you don’t like something tear it off, paint or paste over it.
4. By elimination, breaking and tearing to restructure the work, you can open up a new vision.
5. Text adds interest and throws it off again. Do you take it literally, or as a design element?
6. Working on the whole collage at once and not just in one area, is more satisfying.
7. Elements of design come into play too. Colour, shape, texture, line and form.
8. When creating collage, I use the same cognitive process as when painting.
9. It’s all about trusting the creative process, your intuition, taking risks and challenging yourself.
10. It’s also heaps of fun expressing yourself in this way!
Back to “Free Tutorials”